Installation instructions

Automatic installation using the IAR Plugin Manager (recommended)

  1. Download and install Eclipse.
  2. Start Eclipse and choose 'Help > Install new software'.

  3. Install the IAR Plugin Manager by copying and pasting the following URL in the "Work with" text field:

    https://eclipse-update.iar.com/plugin-manager/1.0

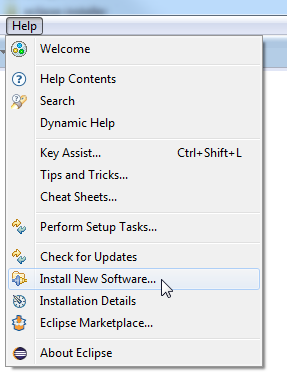
  4. Finish the installation, and restart when needed.

  5. Start the IAR Plugin Manager from Help → IAR Embedded Workbench plugin manager:

  6. The dialog will display a list of Embedded Workbench (EW) targets for which Eclipse support is available on the left pane, and a list of matching installations for the currently selected target in the right pane. Note that detection of EW installations is currently only available on Windows.

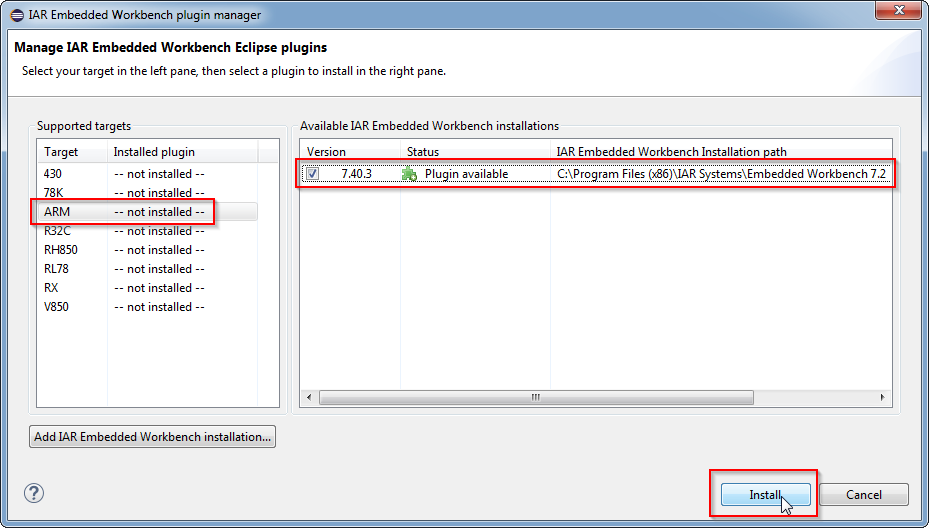
    If your Embedded Workbench installation is not shown in the right pane, it can still be added manually by clicking the Add IAR Embedded Workbench installation... button and selecting the corresponding installation folder (e.g. in /opt/iarsystems/bxarm*).

    Select your target in the left pane, then select your IAR Embedded Workbench installation in the right pane. This will ensure that the Eclipse plugin you install is compatible with the IAR Embedded Workbench version you are using.

    When you are finished, click Install.

  7. The plugin manager will now install your plugin. This may take a while, so be patient. When installation has finished, you will need to restart Eclipse.

Manual installation using the "Install New Software..." dialog

The plugins can also be installed directly using the Install New Software... dialog, without using the plugin manager. To do this, you need to first lookup the update site to use which is compatible with your version of IAR Embedded Workbench version. When you have the correct update site, proceed with the normal Eclipse plugin installation procedure. Please refer to Eclipse documentation for additional information.